Block Paving Installation, Patterns, and Long-Term Maintenance
Block paving is one of the most flexible and long-lasting surfacing options available to the modern landscape architect, designer of the public realm and luxury house builder. If you’re specifying block paving for your next development project – whether it’s a listed building renovation, residential driveway or urban town square – you need to be aware of all aspects of block paving installations to recognise when the job is done well.
A professional paving company should be well versed in everything from laying course specifications to maintenance regimes, which help pave schemes to reach their impressive life expectancies of up to fifty years or more.
We take a look at how the best paving contractors lay block paving, ranging from block type considerations and sub-base preparations to patterns, cutting and upkeep.
BLOCK TYPES
What are the differences between clay and concrete block paving?
Clay block paving is made from natural clay, which is kiln-fired at temperatures above 1,000 degrees centigrade. Due to this manufacturing process clay paving has the best colour stability and UV resistance of any block paving material. Oil resistance is another advantage of clay block paving, as the blocks are non-porous. Clay blocks are ideal for driveways and any areas expected to experience vehicular use.
The compressive strength of a high-quality clay block is typically greater than 100 N/mm², with water absorption of less than 6%. Clay blocks are typically used for their natural range of colours – from warm terracottas to deep purple hues and charcoal greys. The colour is produced by the clay itself, during firing, as opposed to concrete blocks, which are often dyed once formed. Colours are everlasting and will remain consistent throughout the life of the block, which can often exceed half a century.
Concrete block paving is known for its strength and precision. Concrete blocks can achieve compressive strengths of up to 50-60N/mm² and can be manufactured to meet specific performance requirements. Concrete blocks that are hydraulically pressed offer better interlock than cast concrete blocks.
Surface texture can be modified to resemble natural stone or provide a smooth contemporary finish. Concrete blocks are available in a much wider range of colours than clay blocks due to them being manufactured rather than naturally formed.
Concrete block paving can be installed as **permeable paving** . By using blocks with particular joint configurations you can allow water to permeate through the surface at a rate of 270-450 litres per square metre per hour.
LAYING BLOCK PAVING: THE SUB-BASE
Block paving must be installed on top of a solid sub-base for the pavement to last. Too often we see poor-quality installations from unprofessional paving companies who haven’t prepared the site correctly.
The longevity and performance of any block paving installation fundamentally depends upon proper sub-base preparation—a principle that separates professional paving company work from amateur installations.
The sub-base serves several purposes. It helps to distribute loads applied to the surface, allows water to drain through the block paving and prevents lateral movement of the blocks.
For domestic driveways and footpaths, the sub-base should be at least 100mm of compacted Type 1 MOT (Ministry of Transport) stone. Type 1 MOT is graded crushed stone that comes in various sizes from 40mm down to dust. For areas that will receive regular Heavy Goods Vehicle (HGV) traffic, the sub-base layer should be 150-225mm deep.
If your sub-base material meets the above sizes, you will need to make sure that it’s well compacted by using a mechanical plate compactor or vibrating roller. You’re aiming for a compaction percentage of 95% of the maximum dry density of the sub-base material.
You should never lay more than 75mm of stone at a time before compacting. Multiple passes with your compactor are required. Failure to compact your sub-base properly is the number one reason for future sinking and pavement deformation. Not only will you have to repair the issue, but it won’t look good to your client!
The sub-base should be laid with a minimum fall of 1: 60 (equivalent to 17mm per metre) to allow water to run away from any buildings or surfaces and into a channel or drainage point.
If you’re working on a large paving area you will need to think about cross falls and valleys to prevent water from ponding on the finished surface. In some cases, your sub-base can aid with surface water drainage. If you’re installing permeable paving you may want to specify a sub-base layer of clean angular stone. This could be 20mm single-sized aggregate or 40mm single-sized aggregate.
LAYING BLOCK PAVING: THE LAYING COURSE
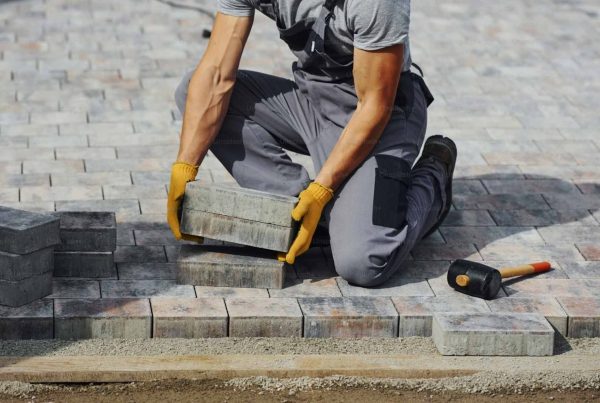
Just as important as the sub-base is the laying course. Also known as sharp sand, the laying course should be between 30-50mm thick and allows for slight adjustment of blocks while laying.
Sharp sand must be BS EN 13242 compliant. It should be clean, have no signs of clay and laid to a consistent depth using screeding rails. Ensure the sand is laid 10-15mm proud of the finished level to allow for compaction.
Professional installers will use aluminium screeding rails laid at the correct height before removing them as they work their way along.
The sand should be dry when you install block paving on top. Wet sand will compact prematurely, which will affect your finished surface. Avoid walking on your laid sand bed by laying planks on top of the blocks where you need to travel. If it’s raining, cover areas that have been prepared to avoid sticking your stop or lay work until the rain subsides. Trust us, your client will appreciate you doing things properly rather than rushing the job and doing it twice!
LAYING BLOCK PATTERNS
Block laying patterns can be the defining feature of a block paved area. However, there are engineering purposes behind each pattern that you should be aware of when specifying.
Herringbone is ideal for driveways and surfaces that will experience the greatest shear forces. The 45 degree pattern offers greater strength than other patterns due to the blocks locking together at right angles.
When cars brake or drive over the blocks, the forces are distributed in multiple directions. This interlock provides up to 30% more strength than a stretcher bond pattern.
The 90 degree herringbone pattern is also a very strong option but is only recommended for domestic driveways as it doesn’t handle shear forces as well as the 45 degree pattern.
Basketweave blocks laid at right angles to each other create a classic pattern. This style is best suited to pedestrian areas and clay blocks to create an authentic cottage garden feel. Basketweave provides very little interlock and should only be used where there is no chance of vehicular use.
A stretcher bond pattern is when blocks run parallel to each other with staggered joints. It’s one of the most cost-effective block patterns due to the amount of blocks required and the speed of installation. This pattern works well with modern buildings and designs but wouldn’t be advised for driveway use unless there is a strong edge restraint to prevent lateral movement of blocks. Concrete haunching or edge restraint systems are often used as edge restraints for stretcher bond block patterns.
Circular blocks, radial patterns and basketweave borders add that extra wow factor. Your chosen installer will need to cut plenty of blocks to achieve these features and will need to spend more time setting them out. If you’re looking to add any intricate patterns or features to your pavement allow extra time for them to be laid.
CUTTING AND EDGE RESTRAINTS
Blocks will need to be cut to allow them to fit around curves, edges and junctions with other materials. Good cutting work will improve the finished look of the paving as well as its performance.
Straight cuts and 90 degree angles should be performed using a petrol block splitter which produces a clean cut. Curved cuts should be performed with a diamond saw. For best results wet saws should be used to reduce dust and stop the block overheating. If clay pavers are being cut be aware that the internal colour of the blocks may show on the cut face; due to variation when fired. This isn’t usually a problem with older properties as it gives a more authentic look but should be made aware of when working on new builds.
Edge restraints stop lateral movement of the paving, also known as creep. Concrete edge courses are generally used where edge restraint is needed, especially on driveways and other areas where vehicles will be driving over the paving. These should be haunched with concrete to half their depth. Alternatively curved edges and internal corners can use aluminium or steel edge restraints. These come in a variety of profiles but all serve the same purpose and are fixed down using ground spikes every 500mm.
The edge of block paving should always finish with either a transition strip or a soldier course either side of the adjoining material. Adjoining materials can be anything from **tarmac surfacing**, concrete, kerb or even natural stone. If paving is installed up to street furniture installation ensure that you keep joint widths consistent and that the blocks are well compacted around the base of the feature.
JOINTING
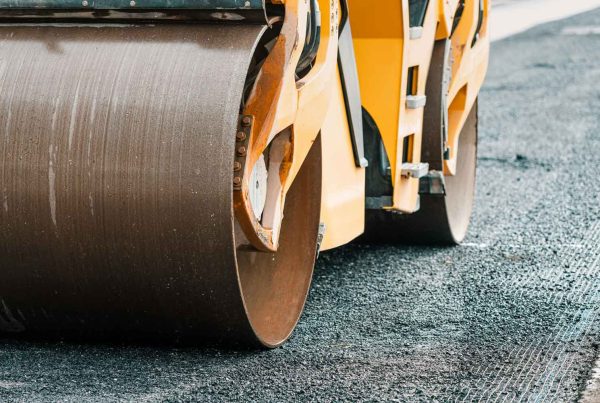
After all the blocks have been cut and laid and the edging reinstated it’s time to joint the blocks. Jointing sand is swept into the joints between blocks and vibrated into place. The vibrations cause the blocks to rub together creating friction which will allow loads to be transferred from block to block.
Jointing sand should be kiln dried sand with a moisture content of less than 1%. This allows the sand to flow through the joint easily and when vibrated packs down. Although there are many recommendations for suitable jointing sand particle size we have found that most jointing sands come between 0.5mm and 2mm. Anything lower and there is a risk the sand will wash out of the joints with heavy rainfall. Anything higher and the sand struggles to fully compact inside the joint.
A rubber plate should be used on the vibrating plate compactor to stop damage to the block paving surface. Several passes with the compactor should be carried out to fully joint the paving. First pass embeds the blocks into the laying course and fills joints partially. More jointing sand is applied and consolidated with the plate compactor. Repeat this process until joints are filled to 3-5mm from the surface of the blocks. You will typically need to repeat this process 3-4 times.
Polymeric jointing sands are also available if weed resistance is a client requirement. These sands have additives which when mixed with water will harden slightly. They are not as stable as mortar joints but will help deter weed growth.
Common Block Paving Failure Types and How to Avoid Them
When detailing how block paving works is important to highlight why it can fail and how these types of failures can be avoided. Block paving doesn’t often fail but when it does there are common causes to most problems.
Block paving can fail due to subsidence, joint sand being washed out or blown away, weeds growing through the joints or staining. Prevention is always better than cure so specifying and installing correctly will eliminate most problems.
Failure due to subsidence is normally caused by poor sub-base preparation. Subsidence can also be caused by a lack of fall or poor site drainage. This allows clay and silt to enter the sub-base and weaken it. Areas of weakness in the sub-base will compress under loading and cause the block paving to settle unevenly. Ensure geotextile membrane is laid and specify enough sub-base depth to cope with the intended loading and adequately compacted. If the sub-grade is weak consider soil stabilisation or increasing sub-base thickness.
Joint sand can be washed out by rainfall or blown away by strong winds. It’s also possible for wind orpressure washing to wash jointing sand out of blocks. Regular maintenance to block paving by re-sanding should prevent problems. Polymeric jointing sands are also available if blown/joint sand is a concern for the client. Ensure your clients are aware of the correct way to clean block paving before they do it.
If permeable paving has been specified use joint widths of 5-8mm to ensure good drainage. Joint widths this small do require well manufactured blocks to ensure a good fit. If poor fitting blocks are laid then gaps will appear allowing weed growth and unwanted moisture into the sub-base.
Weeds can grow in any external paving installation as there’s always going to be seeds blown into the area. By using kiln dried sand and properly jointing block paving weeds can be minimised. If your client wants to be totally weed free annual maintenance of re-sanding can be offered. When removing weeds ensure your clients use a suitable weed killer that won’t stain the block paving.
Oil stains, rust and general organic stains are all possible on block paving. Although it doesn’t effect performance staining can ruin an otherwise nice-looking installation. If staining is likely ensure clay blocks are specified as they are generally less porous. Alternatively concrete blocks can be sealed prior to installation. If staining does occur ensure your client uses a suitable cleaning product to remove the stain.
Block paving repair
Repairing block paving follows much of the same process as laid previously. However instead of preparing the whole area we will only need to repair a small section. The repair area is usually cut out to form a rectangle extending out to paving that has no issues. Start lifting from the middle of the repair area working your way outwards. Blocks should be lifted out with a bolster chisel or specialist block lifting tool.
Once all the blocks have been lifted remove enough laying course sand to inspect the sub-base. If there are no issues with the sub-base replace the laying course sand and replace blocks into their original position. Apply new jointing sand and compact.
If there are issues with the sub-base these will need to repaired before laying new block paving. Once the sub-base is repaired repeat the process from replacing laying course sand onward. Once the paving has been replaced walk over it to compact it into place.
Deciding whether or not to repair locally or renew entire areas is down to how much is damaged and the cause of damage. Contact your local paving company and they will be able to advise if local repairs are suitable or if it would be best to renew the entire area.
Considerations for Joining Block Paving with Other Surfaces
Successful block paving schemes are never just considered on their own merits. By their very nature they need to connect and interact with a range of other features within the landscape and the public realm. The following sections highlight some of these considerations and how they should be factored into the overall design process.
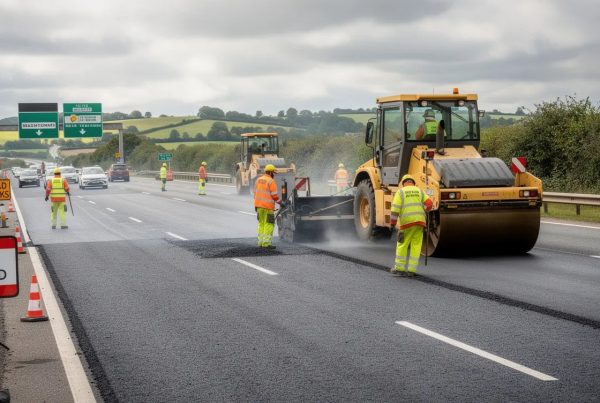
Transition between block paving and tarmac surfacing
In areas such as shopping centres or public parks you will often see block paving surface areas flowing into sections of tarmac surfacing. If this occurs within your project, take care to consider how the two surfaces will meet. The two surfaces have differing levels and as such there is usually a concrete edge beam at the junction. The tarmac will usually butt up to the concrete beam on one side and the blocks will abut on the other. As tarmac has a tendency to flow if it continues onto the block paving area, this will help avoid that happening.
Installation of street furniture around block paving
If your block paving area is to have street furniture installed around its perimeter; benches, bollards, planters or street lights/posts, it’s best to design in where these features will be positioned before the block paving is installed. This way paving layouts can easily flow around them and any foundations required can be installed at the same time. Installing street furniture after block paving can be more problematic as it will almost certainly mean cutting blocks to fit. This interrupts the flow of your block paving pattern and often leaves patched areas that are visible after installation.
White lining on block paving
Just like you would road line tarmac areas, block paving can require white lining too. Whether this be to separate individual parking bay areas; provide directional guidance; or add general safety information. White lining on block paving is not as simple as picking up a pot of road line paint from your local builder’s merchant. Block paving has a textured surface area which these paints simply won’t adhere to. Thermoplastic marking sheets are better but there are also specialist cold applied plastic products available which are designed specifically for use on block paving. An alternative and more permanent method of white lining block paving is to select contrasting colours of block. These can then be laid to create individual parking bays (or other features) that don’t require any repainting.
Block paving and the environment
Block paving specification is now commonly including a consideration of how sustainable a surfacing solution is. In addition to the visual appearance and performance criteria that have been covered in previous sections, here are some of the environmental benefits that can be gained from using block paving:
Permeable block paving
One of the biggest problems with urban development is the increase in surface water run-off which occurs when rain falls on impermeable surfaces. By installing permeable block paving instead of traditional options, rain can soak through the paving into a special sub-base, which temporarily stores the water until it naturally filters away. Permeable paving reduces flood risk, helps keep streets cleaner by filtering out pollutants and helps replenish underground water sources. It also satisfies SuDS requirements. Many of the environmental benefits of permeable block paving are down to the way it is installed. Joint gaps are typically larger at 5-8mm and filled with angular gravel rather than sand. A sub-base of clean stone is used rather than compacted earth.
The blocks themselves can also be chosen with the environment in mind. Clay block paving is made from natural materials and doesn’t require any chemical additives during production. Plus, they can last for over 50 years meaning the energy used during manufacturing has less environmental impact over the life of the installation. Concrete blocks are now often manufactured using recycled materials and blended with other substances to reduce their carbon footprint.
Block paving is also considered to be sustainable because if it needs repairing or replacing individual blocks can be lifted out and moved. This isn’t possible with solid surfaces such as tarmac surfacing or concrete. At the end of its life, both clay and concrete block paving can be recycled and used as aggregate, or in the case of block paving bricks, often cleaned and reused!
Specifications for residential developments and Commercial Applications
We’ve covered a large number of specifications when it comes to block paving for domestic properties. But what about more high end residential developments or prestigious commercial applications? The principles of block paving remain the same but there are some extra specification options that can be considered in order to create a more luxurious finish.
Often seen on driveway applications high-end clay pavers offer natural colour variation and a textured finish. This provides a more expensive looking block paving driveway or terrace that complements traditional properties. Another option would be to specify blocks with ‘tumbled’ edges and a more textured surface. This creates the effect of old, weathered blocks which can work well on period properties or extensions to older homes.
Specifications for contemporary homes or commercial developments will typically specify concrete block paving instead of clay. Blocks with smooth faces and sharper edges are popular as are larger sized blocks (300mm x 300mm or above). The larger the blocks, the fewer joints there are which helps to create a calm, minimal look. However, larger format block paving needs to be installed on top of a properly prepared sub-base. As there are less blocks used in a specific area, any movement in the sub-base is more likely to occur which can cause your paving to settle unevenly.
When specifying block paving for any property it’s also worth considering how block colour will work with the buildings surrounding materials. For traditional homes with brick facades you may wish to use terracotta or buff coloured blocks. Charcoal grey and grey-blue blocks are becoming increasingly popular on modern homes to help contrast with the building itself. Multi-tonal blend packs are also available where multiple colours of block are mixed together during installation.
There you have it… Everything you need to know about Block Paving!
If you’ve read all of the above you are now armed with enough information to be able to confidently specify or talk to contractors about block paving. Remember, good preparation and an appropriately chosen specification are key to a block paving installation that will continue to look good for decades to come. Picking the right Paving Services company to install your block paving is equally as important. For more information on what you should look for when selecting a block paving contractor please read our dedicated article on the subject.